")


")


")

")
")
 in Excel & Google Sheets")


If you’ve ever opened a long report, thesis, or eBook, you know how helpful a Table of Contents (TOC) can be. In print, it’s just a list of chapters with page numbers. But in digital documents—like Word files or PDFs—it can be clickable, letting readers jump straight to the section they need.
The good news? You don’t need fancy software to make this happen. Microsoft Word can create a clickable TOC for you, and when you save your file as a PDF, the links still work.
In this guide, I’ll show you two ways to do it:
- Building a custom clickable TOC using bookmarks.
- Using Word’s built-in Table of Contents tool.
Why Clickable Tables of Contents Are Important
A clickable Table of Contents makes navigating a document effortless. Instead of endless scrolling, readers can jump straight to the section they need with a single click. It also gives your work a polished, professional look—perfect for reports, manuals, or eBooks.
Best of all, when you export your Word file to PDF, the links stay active, so the navigation works seamlessly across formats.
Whether you’re creating a short 5-page report or a 200-page thesis, a clickable TOC makes the reading experience faster and more user-friendly.
Method 1: Create a Custom Clickable Table of Contents in Word
This option gives you more control over how your TOC looks—you create it manually, then link each entry to the right section. Here’s how:
Step 1: Add a Bookmark
In this example, the content starts on page 2 since page 1 is reserved for the Table of Contents.
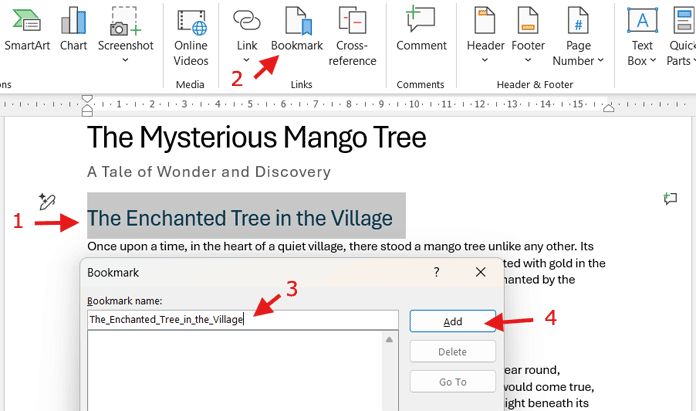
- Go to the section you want to link—for example, the heading “The Enchanted Tree in the Village” at the top of page 2.
- Select the heading text.
- Go to Insert > Bookmark.
- Type a bookmark name (no spaces—use underscores if needed, like
The_Enchanted_Tree_in_the_Village). - Click Add.
Step 2: Link the TOC Entry
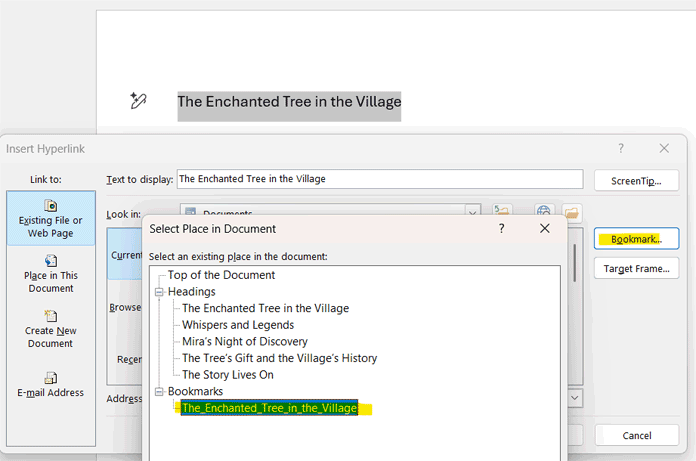
On the first page, start creating your Table of Contents. For example, type the entry “The Enchanted Tree in the Village” and follow these steps:
- Highlight the text.
- Go to Insert > Link.
- In the dialog box, choose Bookmark and select the one you just created.
- Click OK.
That’s it—your TOC entry is now clickable! Repeat the same process for each chapter or heading in your document.
Step 3: Save as PDF with Active Links
To make sure your clickable Table of Contents also works in a PDF, first create it in Word as shown above, then save the document as a PDF:
- Go to File > Save As.
- Choose PDF as the format.
- Save.
Your clickable TOC will now work in the PDF.
Method 2: Use Word’s Built-in Table of Contents Tool
If you’d rather let Word do the heavy lifting, the built-in tool is the way to go.
Step 1: Apply Heading Styles
Word recognizes headings only if they are properly formatted. To prepare your document for a built-in Table of Contents:
- Select the heading text.
- Apply one of the following styles:
- Heading 1 for main sections
- Heading 2 for subsections
- Heading 3 for sub-subsections
- You can find these options in the Home tab > Styles group.
Once your headings are properly styled, you’re ready to insert the built-in Table of Contents.
Step 2: Insert the Table of Contents
- Place your cursor where you want the TOC.
- Go to References > Table of Contents.
- Pick Automatic Table 1 or Automatic Table 2.

Word instantly generates a clickable TOC.
Step 3: Update the TOC When Needed
If you edit your document later, click inside the TOC and hit Update Table.
- Choose Update page numbers only if nothing else changed.
- Choose Update entire table if you added or removed sections.
Step 4: Customize the TOC Appearance
- Go to References > Table of Contents > Custom Table of Contents.
- From here, you can change fonts, dotted lines, or decide how many heading levels to include.
Which Method Should You Choose for Your Word TOC?
After exploring both approaches, you might be wondering which one is right for your document.
- Custom TOC (bookmarks): This method is ideal if you want a creative layout or only have a few headings. Keep in mind that it can become tedious if your document has many headings.
- Built-in TOC: Perfect for longer, structured documents. It’s fast, automatic, and easy to update as you add or remove content.
Both methods create a clickable Table of Contents that works seamlessly in Word and carries over to PDF, so you can choose the one that best fits your needs.
Final Thoughts on Creating a Clickable TOC
A clickable Table of Contents is a small detail that makes a big difference in user experience. Whether you prefer the DIY bookmark method or Word’s automatic tool, your readers will thank you for making navigation painless. And when you export to PDF, the links come with it—no extra work required.