If you want to perform repeated tasks, you can record such tasks with Macros and run them using keyboard shortcuts or by clicking the macro name in the Macros menu.
For example, imagine you have a sales report—just raw data without any formatting. You can start recording a macro just before you begin formatting, such as adding borders, aligning values to the center, applying currency formatting, etc. Once finished, save the macro.
If you get the same type of raw data next month, with the same number of rows and columns, you can run the macro to apply the formatting automatically. This will save your time and ensure consistency in your formatting.
In another example, if you have a label in a cell formatted with fill color, font size, and font color, you can apply the same formatting to the active cell or a selected range by running a macro.
Sometimes, you may encounter errors if the macro is not properly recorded or applied. This tutorial explains recording and running macros in Google Sheets, along with troubleshooting common issues.
The Macro Menu
You can find Macros under the Extensions > Macros menu.
Google rarely moves menu items. Earlier, it was located under the Tools menu, just like charts were moved from Data to Insert in the past.
Things to Know Before Recording Your First Macro
There are certain things you should know before you start recording and running macros:
1. Use Absolute References
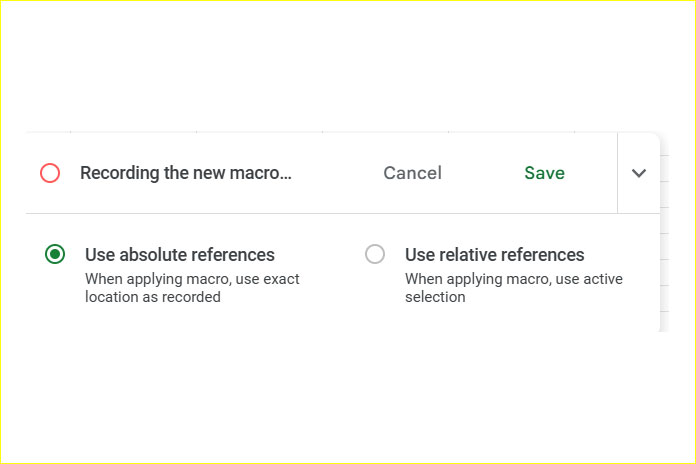
When you click Extensions > Macros > Record Macro, you will see two options: one of them is absolute reference.
- When you record a macro with this option, it will always apply to the same cell or cell range in the active sheet.

2. Use Relative References
When you record a macro with relative references, the macro applies changes starting from the active cell. This may cause errors if the active cell is not correctly positioned before recording the macro.
If you are applying changes to a range and recording that action, make sure the active cell is the top-left cell in the range. This can help avoid common errors, such as the following:
Common Errors
- “The starting row of the range is too small”:
This occurs when the macro tries to apply changes to a non-existent row (e.g., row 0). - “The starting column of the range is too small”:
Similar to the previous error but for columns. - “The parameters (Boolean, Boolean, Boolean, Boolean, Boolean, Boolean, String, number) don’t match the method signature for SpreadsheetApp.RangeList.setBorder”:
This error can happen due to several reasons, such as potential script conflicts or incorrect arguments being passed to the method.
Recording Macros in Google Sheets
Let’s say we have a sales report in Sheet1, range A1:E8, without formatting. We want to:
- Add borders.
- Apply a fill color to the header row.
We’ll record this as a macro using both absolute and relative references.
Steps:
- Navigate to the first cell of the table (e.g., A1).
- Go to Extensions > Macros > Record Macro. The default mode is absolute reference.
- Select the range A1:E8.
- Apply the desired formatting:
- Add borders to the range.
- Apply a fill color to the header row.
- Click Save.
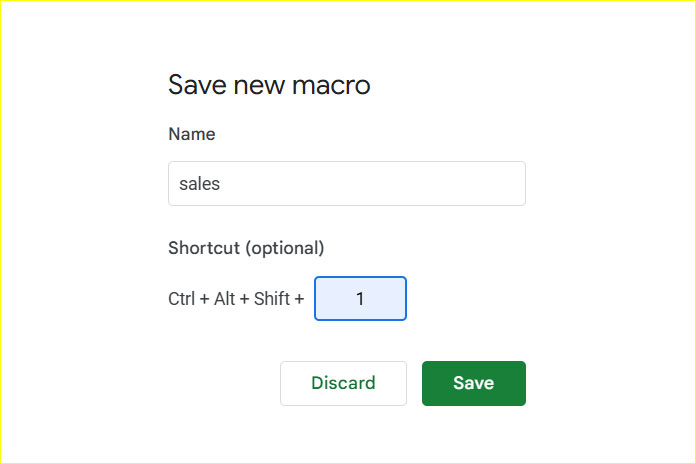
- Name the macro (e.g., “Sales”).
- Optionally, assign a shortcut (e.g.,
Ctrl+Alt+Shift+1). - Click Save again to complete the recording.

Running Macros in Google Sheets
Let’s run the macro you just recorded. First, create an unformatted version of the sales report in Sheet2 with the same dimensions:
Steps:
- Copy the contents of the range A1:E8 from Sheet1:
- Right-click and select Copy.
- Paste it into Sheet2, starting from cell A1:
- Right-click and choose Paste Special > Values only.
Running the Macro:
- Ensure Sheet2 is the active sheet. The active cell can be any cell.
- Go to Extensions > Macros and select the macro name (e.g., “Sales”).
- If you’ve set a shortcut, you can use it instead.
- For the first run, you’ll need to grant authorization. Follow the on-screen instructions.
- After granting permission, run the macro again. It will format the range A1:E8 as recorded.
Note: If the macro was recorded with relative references, the formatting will start from the active cell and apply to a range of the same dimensions.
Managing Macros
You can manage or delete macros through Extensions > Macros > Manage Macros.
- Click the three-dot menu next to the macro name.
- Select Remove to delete the macro.
Important Notes
- Macros are stored as Apps Script projects attached to the Google Sheet. You can view and edit the script for advanced customizations.
- Macros work only within the same file. To reuse a macro in another file, export the script and import it into the target file.


