Section breaks should be a basic feature in any document editor—whether it’s Google Docs, MS Word, or any other tool. While Google Docs didn’t have this feature in the early days, it’s now available and quite handy.
In this post, I’ll show you how to use a section break in Google Docs to set up different page margins, headers/footers, and even restart page numbers—all within the same document.
Let’s first look at what a section break is, how to insert it, view it, and delete it. Then we’ll dive into some practical examples.
What Is a Section Break in Google Docs?
Section breaks are similar to page breaks—you can use both to start content on a new page. But section breaks go a step further. They allow you to apply different page setups to different sections in the same Google Docs file.
So if you want part of your document to have different margins or headers, a section break is the tool for the job.
How to Insert Section Breaks in Google Docs
There are two types of section breaks in Google Docs:
- Section break (next page)
- Section break (continuous)
No matter which one you need, here’s how to insert it:
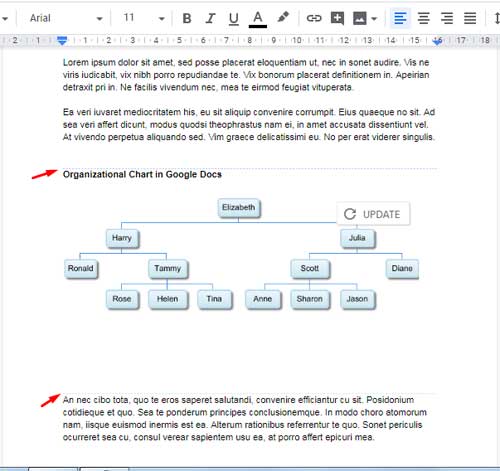
Let’s say you’ve got a document where the first page is a table of contents, the second page is Chapter 1, the third is Chapter 2, and so on.
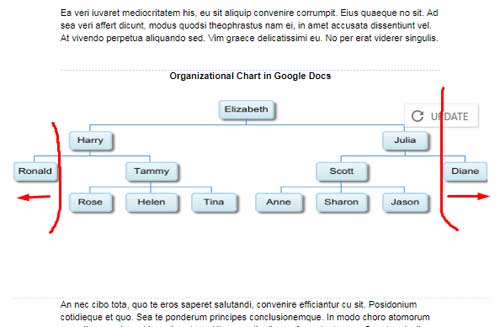
Now, imagine there’s an organizational chart on the second page. You want that chart to stretch from the left to the right edge of the page, without affecting the layout of the rest of the document. To do that, you’ll need to insert section breaks before and after the chart.
Here’s how:
- Place the cursor just before the text you want in the new section (e.g., before “Organizational”).
- Go to Insert > Break > Section break (continuous).
- Repeat the same just after the chart (e.g., before “An…” or the next line of text).
You’ll see blue text labels indicating section breaks (like “Section break (continuous)” or “Section break (next page)”)—if you’ve enabled Show non-printing characters (details below).
If you use Section break (next page) instead, the content (in this case, the chart) will move to a new page.
How to View and Delete Section Breaks
To manage section breaks easily, you need to turn on non-printing characters:
- Go to View > Show non-printing characters.
- You’ll now see section breaks as blue labels: e.g., “Section break (continuous)” or “Section break (next page)”.
- To delete a section break, click just to the left of the label and press Delete.
That’s it!
How to Set Different Margins for Sections
Now let’s say you want to set different margins for a certain section (for example, to stretch a chart or an image).
- Insert section breaks before and after the content.
- Go to File > Page setup.
- Choose the section from the dropdown and set the desired margins.
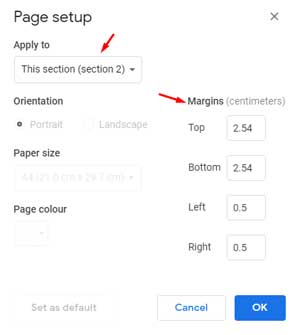
This way, the new margins will apply only to the section you selected, not the entire document.
How to Use Section Breaks for Different Headers or Footers
Another great use of section break in Google Docs is to customize headers and footers by section.
Say you want a different header for the page with the organizational chart:
- Insert a Section break (next page) before and after the chart.
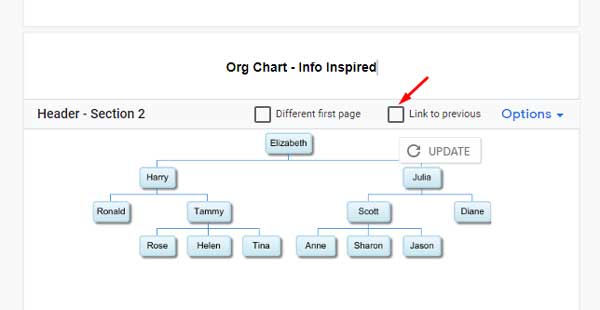
- Go to the page with the chart and click Insert > Headers & footers > Header.
- Uncheck “Link to previous”.
- Type your custom header.
Want more control? Click on Options next to “Link to previous” and choose Header format. Here you can adjust the header’s distance from the top and choose whether it applies to just the current section or onwards.
How to Restart Page Numbers Using Section Breaks
You can also restart page numbering at any section. Here’s how:
- Add your initial page numbers: Insert > Page numbers (choose a style).
- Go to the page where you want numbering to restart.
- At the end of the previous page, place your cursor and insert a Section break (continuous).
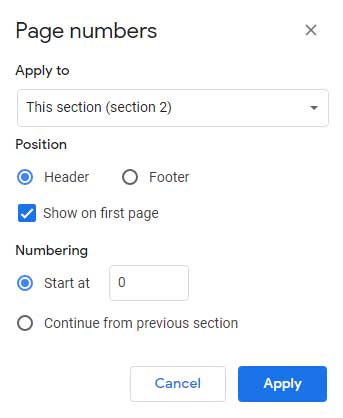
- Double-click the page number on the next page.
- Click Options > Page numbers.
- Check “Start at” and set the number (e.g., 1 or 0).
- Click Apply.
Your page numbers will now restart from the point you specified.
Conclusion
So that’s how you use a section break in Google Docs—not just to break your content into sections but to apply different layouts, headers, footers, and even page numbers within the same document.
Hope this guide helps you get the most out of this feature. Let me know in the comments if you have questions or tips of your own!


