


")


")

")
")
 in Excel & Google Sheets")


In Google Docs, you can add a full-page border to every page easily — including documents that already have multiple pages. This method works for both new blank documents and existing multi-page files, and it’s far more flexible than the common tricks you may have tried before.
Most users try solutions like inserting a drawing or adding a 1×1 table. While these can work in simple cases, they fall short when you have a longer document. The drawing approach usually requires copying and pasting the border onto each page, and the single-cell table trick often forces you to create a new document and paste your content into it — which is not ideal.
Here’s a better, more dynamic Google Docs page border hack that applies consistently across pages without repeating work. This method uses a drawing object in a smart way so the border adapts and remains aligned across the entire document.
Below are step-by-step instructions for both new documents and existing multi-page documents.
Google Docs Page Border Hack — Empty Document (Automatically Applies to New Pages)
Open a blank Google Docs file. The quickest way is by typing docs.new into your browser’s address bar and pressing Enter.
Once your document is open, follow the steps below to create a beautiful full-page border in Google Docs that will automatically apply when new pages are added.
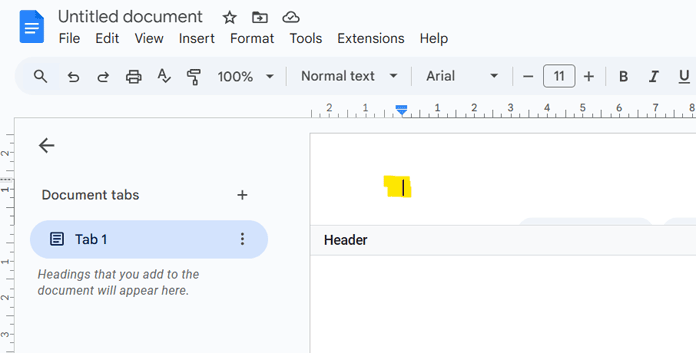
Step 1: Navigate to the Header Area in Google Docs
The simplest method is to double-click in the top margin area of the page. This activates the header and makes it visually stand out. Alternatively, you can go to Insert > Page Elements > Header.
Keep the cursor inside the header area. If you click outside, the header closes — and we don’t want that yet.
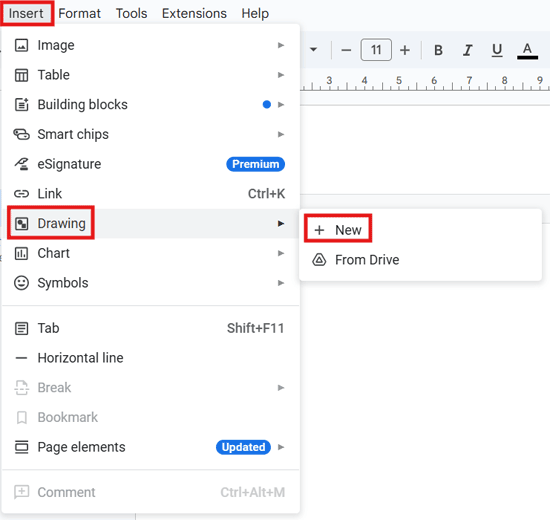
Step 2: Open the Drawing Canvas
Go to Insert → Drawing → New. This opens the drawing canvas.
Step 3: Create the Border Shape
Click the Shape icon, then choose Shapes → Rectangle.
Draw a rectangle that roughly resembles the page shape — taller than wide.

The exact size doesn’t matter right now, but make sure the proportions look natural. If the rectangle isn’t proportional, the border thickness may appear uneven once resized.
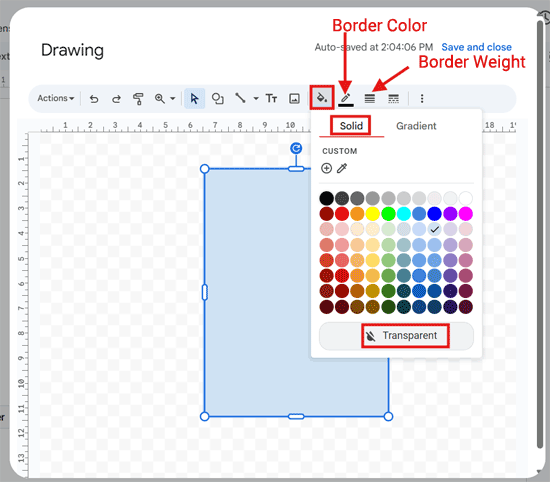
Step 4: Customize the Border
We only want the border line, not a filled shape.
Keep the rectangle selected, then:
- Click Fill color → Transparent
- Click Border color and choose your preferred color (example: purple)
- Click Border weight and adjust thickness (example: 3px)
You can modify the border styling later at any time.
Step 5: Save and Close
Click Save and Close to insert the rectangle into your document’s header area.
Step 6: Apply Text Wrapping
Click anywhere within the border object to display the layout options, then click Image options.
Under Text wrapping, choose Behind text.

This is what allows the border to act like a page background.
Step 7: Resize the Border to Fit the Page
Drag the handles on the border outward — left, right, top, and bottom — until it fits neatly around the page area.
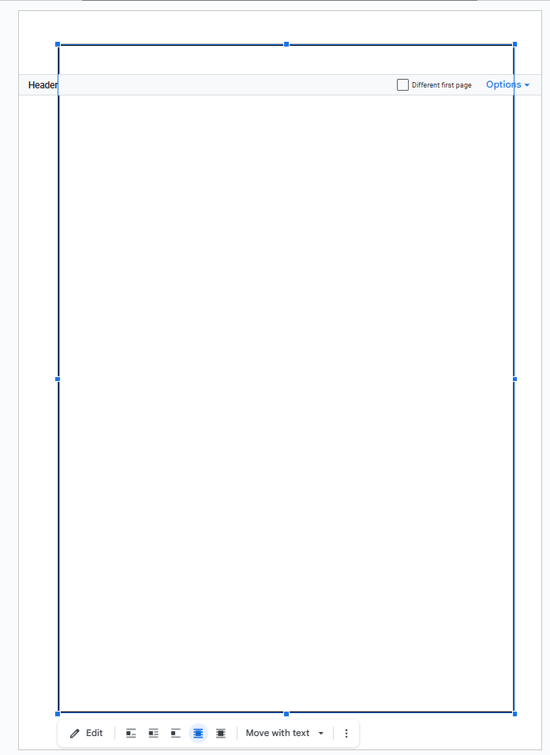
Drag the bottom edge down until it sits inside the footer area, ensuring perfectly even spacing on all sides.
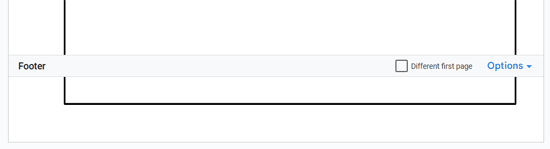
If you want to check the alignment, enable the footer by clicking Insert > Page elements > Footer.
Step 8: Final Touch
Click anywhere outside the border and outside the header or footer. For example, you can click on the left side of the page, outside the border area.
Now type a few sentences and check that the content sits fully inside the border. If anything looks off, adjust by gently dragging the border edges. (To adjust, double-click inside the header area to reactivate the border for editing.)
As you move on to the next page — by pressing Enter repeatedly, adding a page break, or inserting more content — the border will carry along automatically. That means every new page will have its own border without any extra work.
This is how we create a dynamic Google Docs page border that works beautifully with long documents, existing content, and new pages — without any copy-pasting.
Google Docs Page Border Hack — Existing Multi-Page Document
You can follow the exact same steps above to add a page border to an existing Google Docs document with multiple pages.
Apply the border setup only on the first page — you don’t need to repeat the steps on every page. Once the border is placed correctly, Google Docs will automatically carry it through to all new and existing pages in the document.
Since you already have text, you will clearly see how far the border must be adjusted when you reach Step 7.
Simply drag the border so it sits neatly around your existing content, ensuring the bottom edge stays inside the footer area for a clean, even look.

Adding Page Borders in Documents with Both Portrait and Landscape Pages
Consider an existing document with several pages that includes both Portrait and Landscape layouts — for example, when you need a wider page to fit a large table or chart. When a document mixes page orientations, it means section breaks are already in use.
Depending on how the section break is set up, the steps you followed above to add a Google Docs page border might automatically apply the same Portrait-style border to the Landscape page as well — or it may not appear at all.
If the border is not showing on the Landscape page, simply repeat the same Google Docs page border method there.
If the Portrait border has carried over and you want to customize it separately, first remove it:
- Double-click on the header of the Landscape page.
- Turn off Link to previous.
This removes the inherited Portrait border. Now, add a new border using the same steps described earlier.

One important note: when drawing the shape to create the border in Step 3, drag and size it according to the Landscape orientation (wider than tall), not the Portrait style.
You May Like: How to Make Just One Page Landscape in Google Docs
FAQs — Google Docs Page Border Hack
1. Will the Google Docs page border print correctly or export to PDF?
Yes. Because we use Behind text wrapping, the border prints perfectly and exports cleanly to PDF. Just ensure your printer margins are not unusually large.
2. Can I edit the border later without messing up the layout?
Absolutely. Double-click the border to reopen the drawing canvas and change the border color, weight, or style — updates apply instantly.
3. What if my footer text overlaps the bottom border?
Drag the bottom edge of the rectangle slightly upward or adjust the footer spacing. A small tweak fixes it.
4. Does this method support headers, footers, and page numbers?
Yes — everything works normally because the border sits behind the content.
5. Does the Google Docs page border hack work on mobile?
You can view it on mobile, but editing is easier on desktop. Once created, you can continue editing your document anywhere.
6. Can I use rounded borders or different patterns?
Yes — choose Rounded rectangle in the drawing canvas, or use dotted or dashed lines for stylized designs.
Final Words
That’s how to add a dynamic full-page border in Google Docs that repeats automatically on every page — without copying or rebuilding your document. This simple Google Docs page border hack works perfectly for long reports, assignments, books, planners, project documentation, and professional printable designs.
Once set up, every new page automatically inherits the same border, and you can customize everything from a single place through the drawing canvas.
Give it a try and see how clean and professional your documents look with a proper page border around every page.
If you found this guide helpful, feel free to bookmark it or share it with others.